Attaching the Kite's Lines
Properly attaching the kite’s lines to your inflatable kite is very important. Crossed lines can cause your kite to spiral out of control and hurt you or someone else. It is not a difficult thing to do, but there are two different ways
you can attach your lines, and they can not be mixed up. You can attach your lines with:
• The Control Bar Downwind
• The Control Bar Upwind
Both methods work equally well, but they are different from each other, so it is best to stick with one. This page also covers:
• The Basics of Attaching the Lines
• The Pre-Flight Check
Please note: This page only covers inflatable (LEI) kites. Any other kind of kite may require a different method to attach the lines.
The Basics
Before we get into the how-to, let’s go over a few important points.
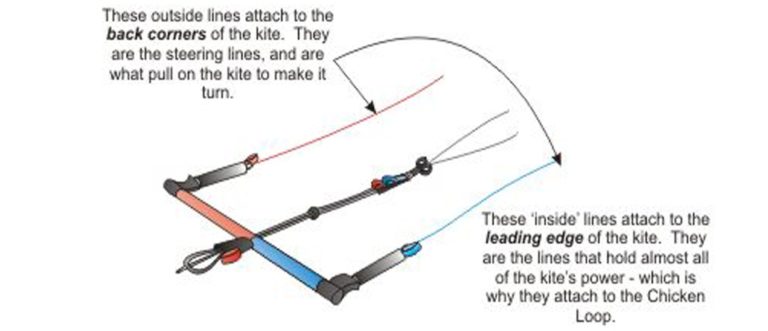
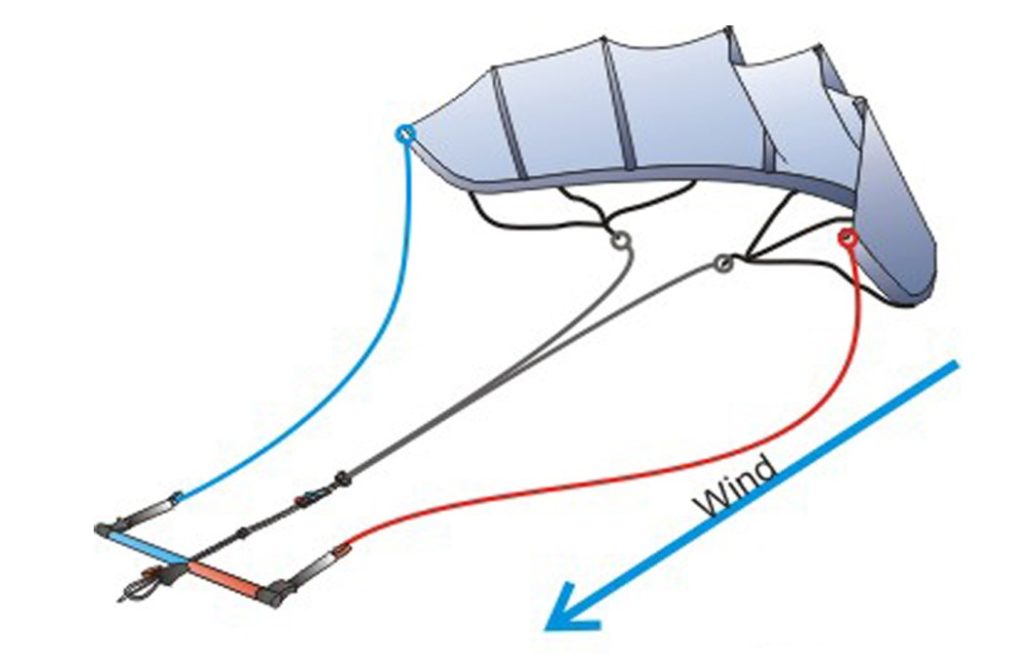
1. When you look at the bar, the middle lines always attach to the leading edge
of the kite. Always.
2. These are the lines that transfer all
of the power of the kite into the chicken loop. They carry nearly the entire load of the kite.
3. . The outside lines are the steering lines for the kite, and they always attach to
the back corners of the kite.
4. . The left lines must always connect
with the left side of the kite. The right lines must always connect with the right side of the kite.
Viewed from Your Perspective
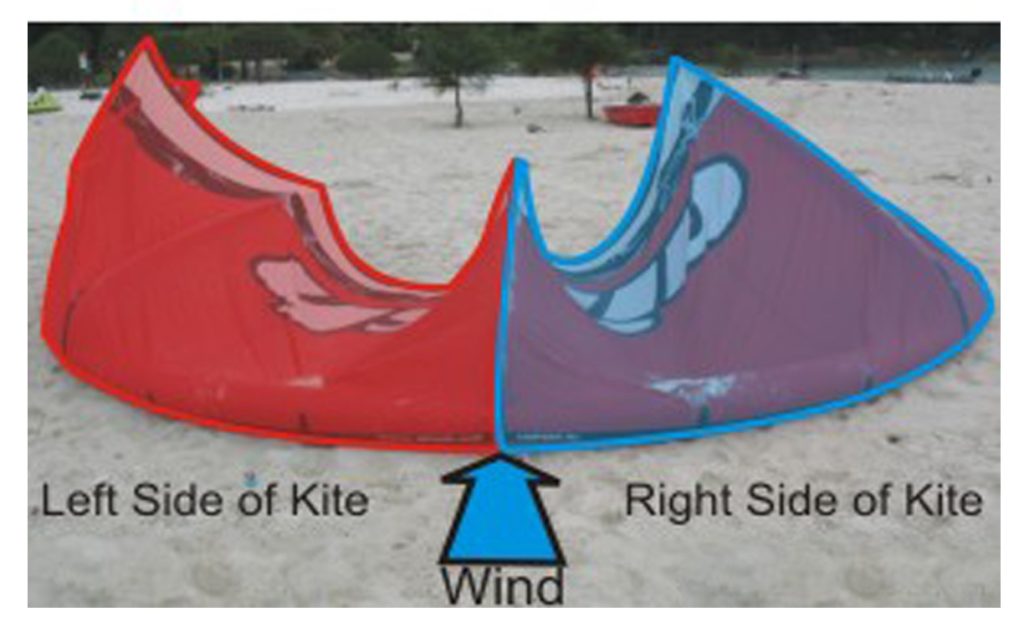
The left side of the kite is the side on the left when the kite has its leading edge intothe wind, and you are upwind looking at it.
Attaching the Kite's Lines with the Control Bar Upwind
Starting at the kite, unwind the lines upwind. Hold your bar, turn around and face your kite.
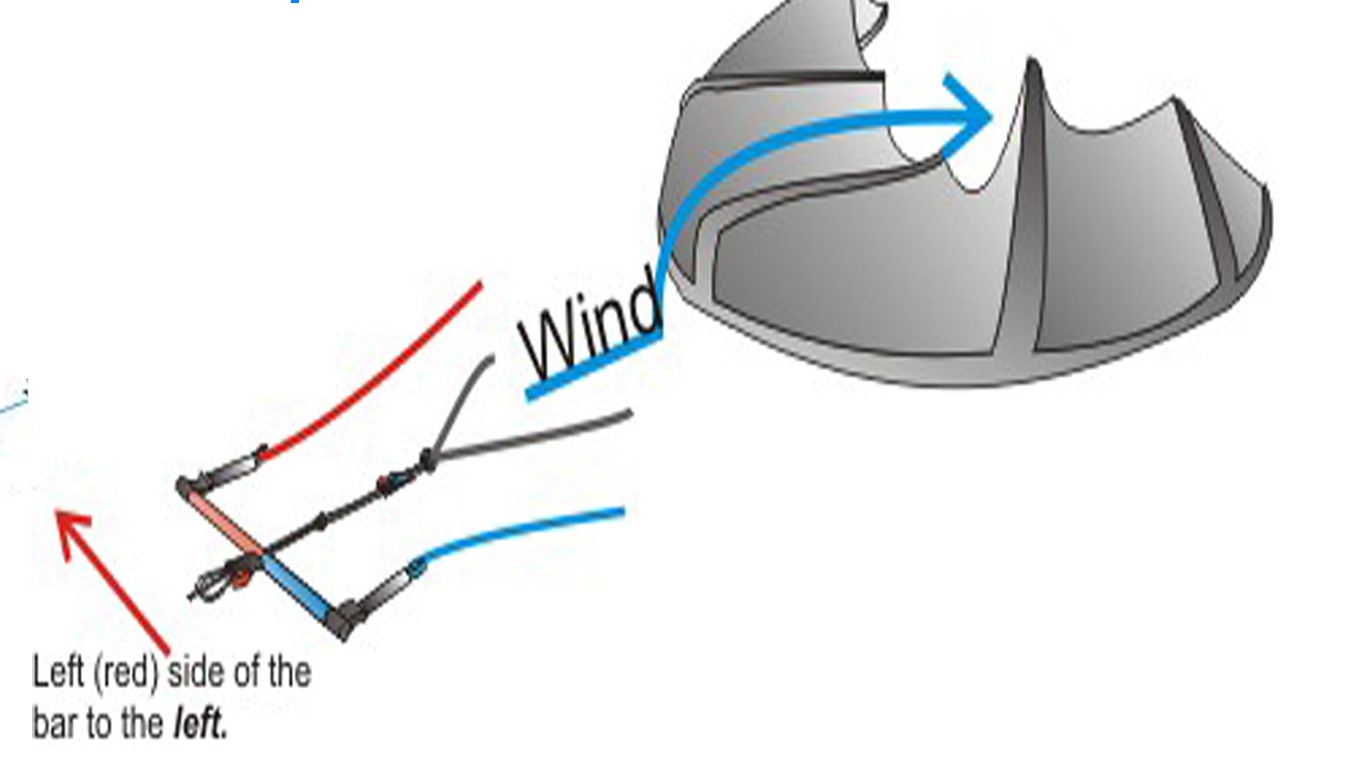
You will be looking towards the front of the kite.
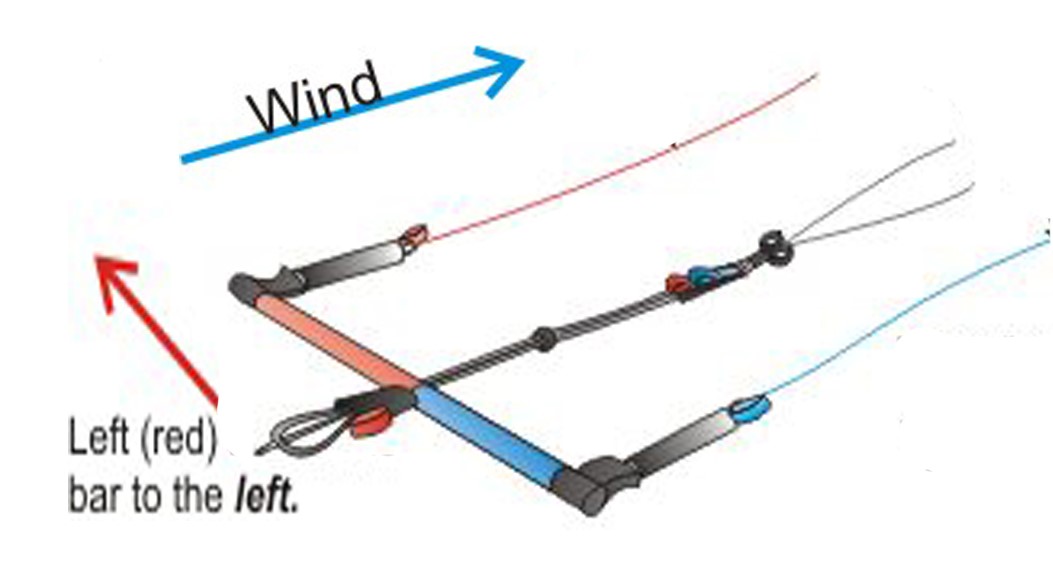
Left (red) side of the bar to the loft.
Place the bar on the ground, with the red side (left of the bar) to the left.
Separate the lines. Place the outside lines on either side of you, outside of your legs. Step over the inside lines so that they are between your legs.
Take the lines in your hand and separate them in your fingers , starting from one side and working to the other. Make sure to keep the lines in the order that they are in on the ground.
Separate the lines all the way to the kite. Once separated, lay the lines
on the ground, making sure that the back lines are out to their respective sides .
*As you separate the lines, inspect them for wear or knots. If you find any, fix the problem.

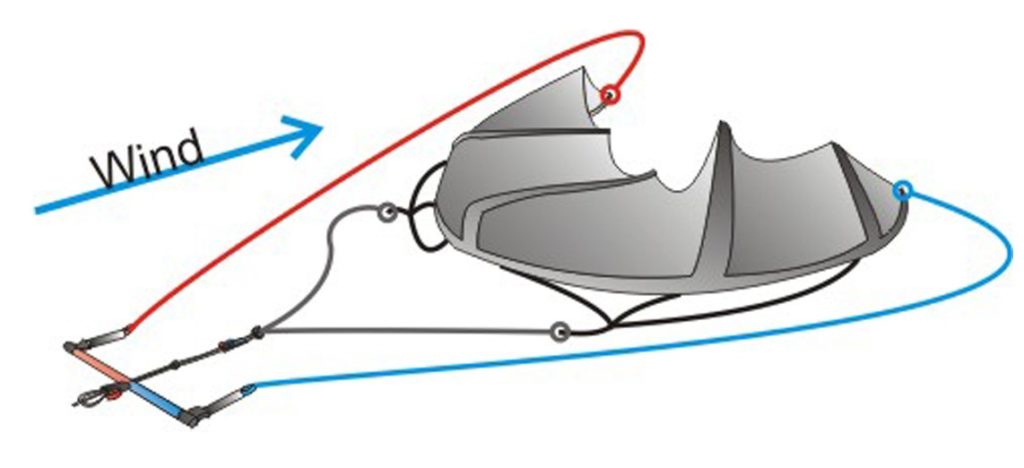
Attach the front lines to the leading edge of the kite (next picture).
Do not worry if these lines have a twist. The front lines have a pivot that keeps the lines untwisted at all times .
Attach the back lines to the back corners of the kite.
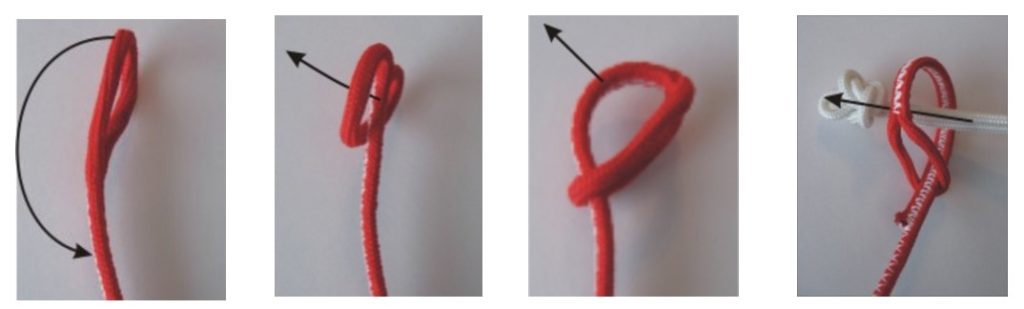
The lines are attached with a Larks Head Knot –
Before flying the kite complete the pre-flight check.
The Pre-Flight Check
Always conduct a pre-flight check – it takes 10 seconds and is your second chance to verify that your lines are connected properly.
All you need to do is:
Lift your bar so that the lines lift off of the ground.
Look down each line, giving it a shake if you need, and make sure that it is free of twists and tangles with the other lines.
You must visually confirm that each back line attaches directly to the back of the kite and is free of any tangles.
The best and safest way to make sure your kite’s lines are attached properly is to pre-flight it yourself, and then ask a friend to do the same. It takes very little time and is much safer than not doing it.
Once you are sure your kite’s lines are attached properly, you’re ready for launch…
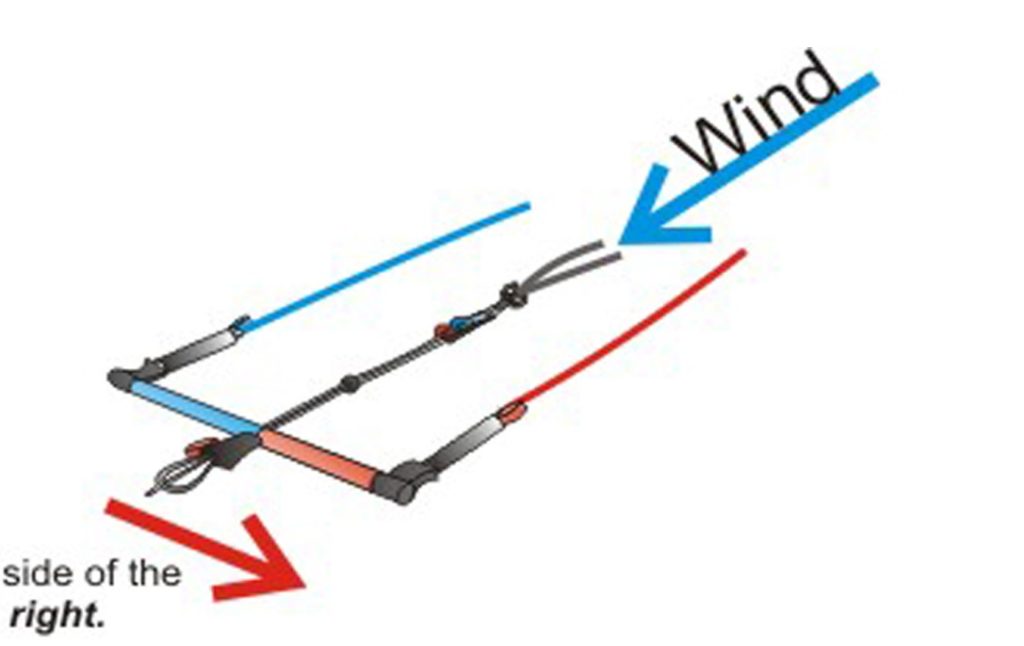
Attaching the Kite's Lines with the Control Bar Downwind
1 -Starting at the kite, unwind the lines downwind.
2 -Hold the bar and turn around and face your kite.
You will be looking towards the back of the kite.
3 -Place the bar on the ground,
with the red side (left of the bar) to the right.
Separate the lines.
Place the outside lines on either side of you, outside of your legs.
Step over the inside lines so that they are between your legs.
Left (red) side o bar to the right.
Take the lines in your hand and separate
them in your fingers, starting from one side and working to the other.
Make sure to keep the lines in the order that they are in on the ground.
Separate the lines all the way to the kite.
Once untangled lay the lines on the ground, making sure that the back lines are out to their respective sides.
*As you separate the lines, inspect them for wear or knots.
If you find any, fix the problem .
Attach the front lines to the leading edge of the kite (next picture).
Do not worry if these lines have a twist.
The front lines have a pivot that keeps the lines untwisted at all times.
Attach the back lines to the attachment point on the back corners of the kite.
The lines are attached with a Larks Head Knot Complete the pre-flight check, before flying it.